Starting Component Development
Making the Connection
-
Install an OpenSSH client as recommended in https://code.visualstudio.com/docs/remote/ troubleshooting#_installing-a-supported-ssh-client . In Windows 10 you can install Windows OpenSSH Client from https://docs.microsoft.com/en-au/windows-server/administration/openssh/openssh_install_firstuse
-
Make sure you have the latest version of Visual Studio Code. Then install the “Remote – SSH” extension from https://marketplace.visualstudio.com/items?itemName=ms-vscode-remote.remote-ssh :

-
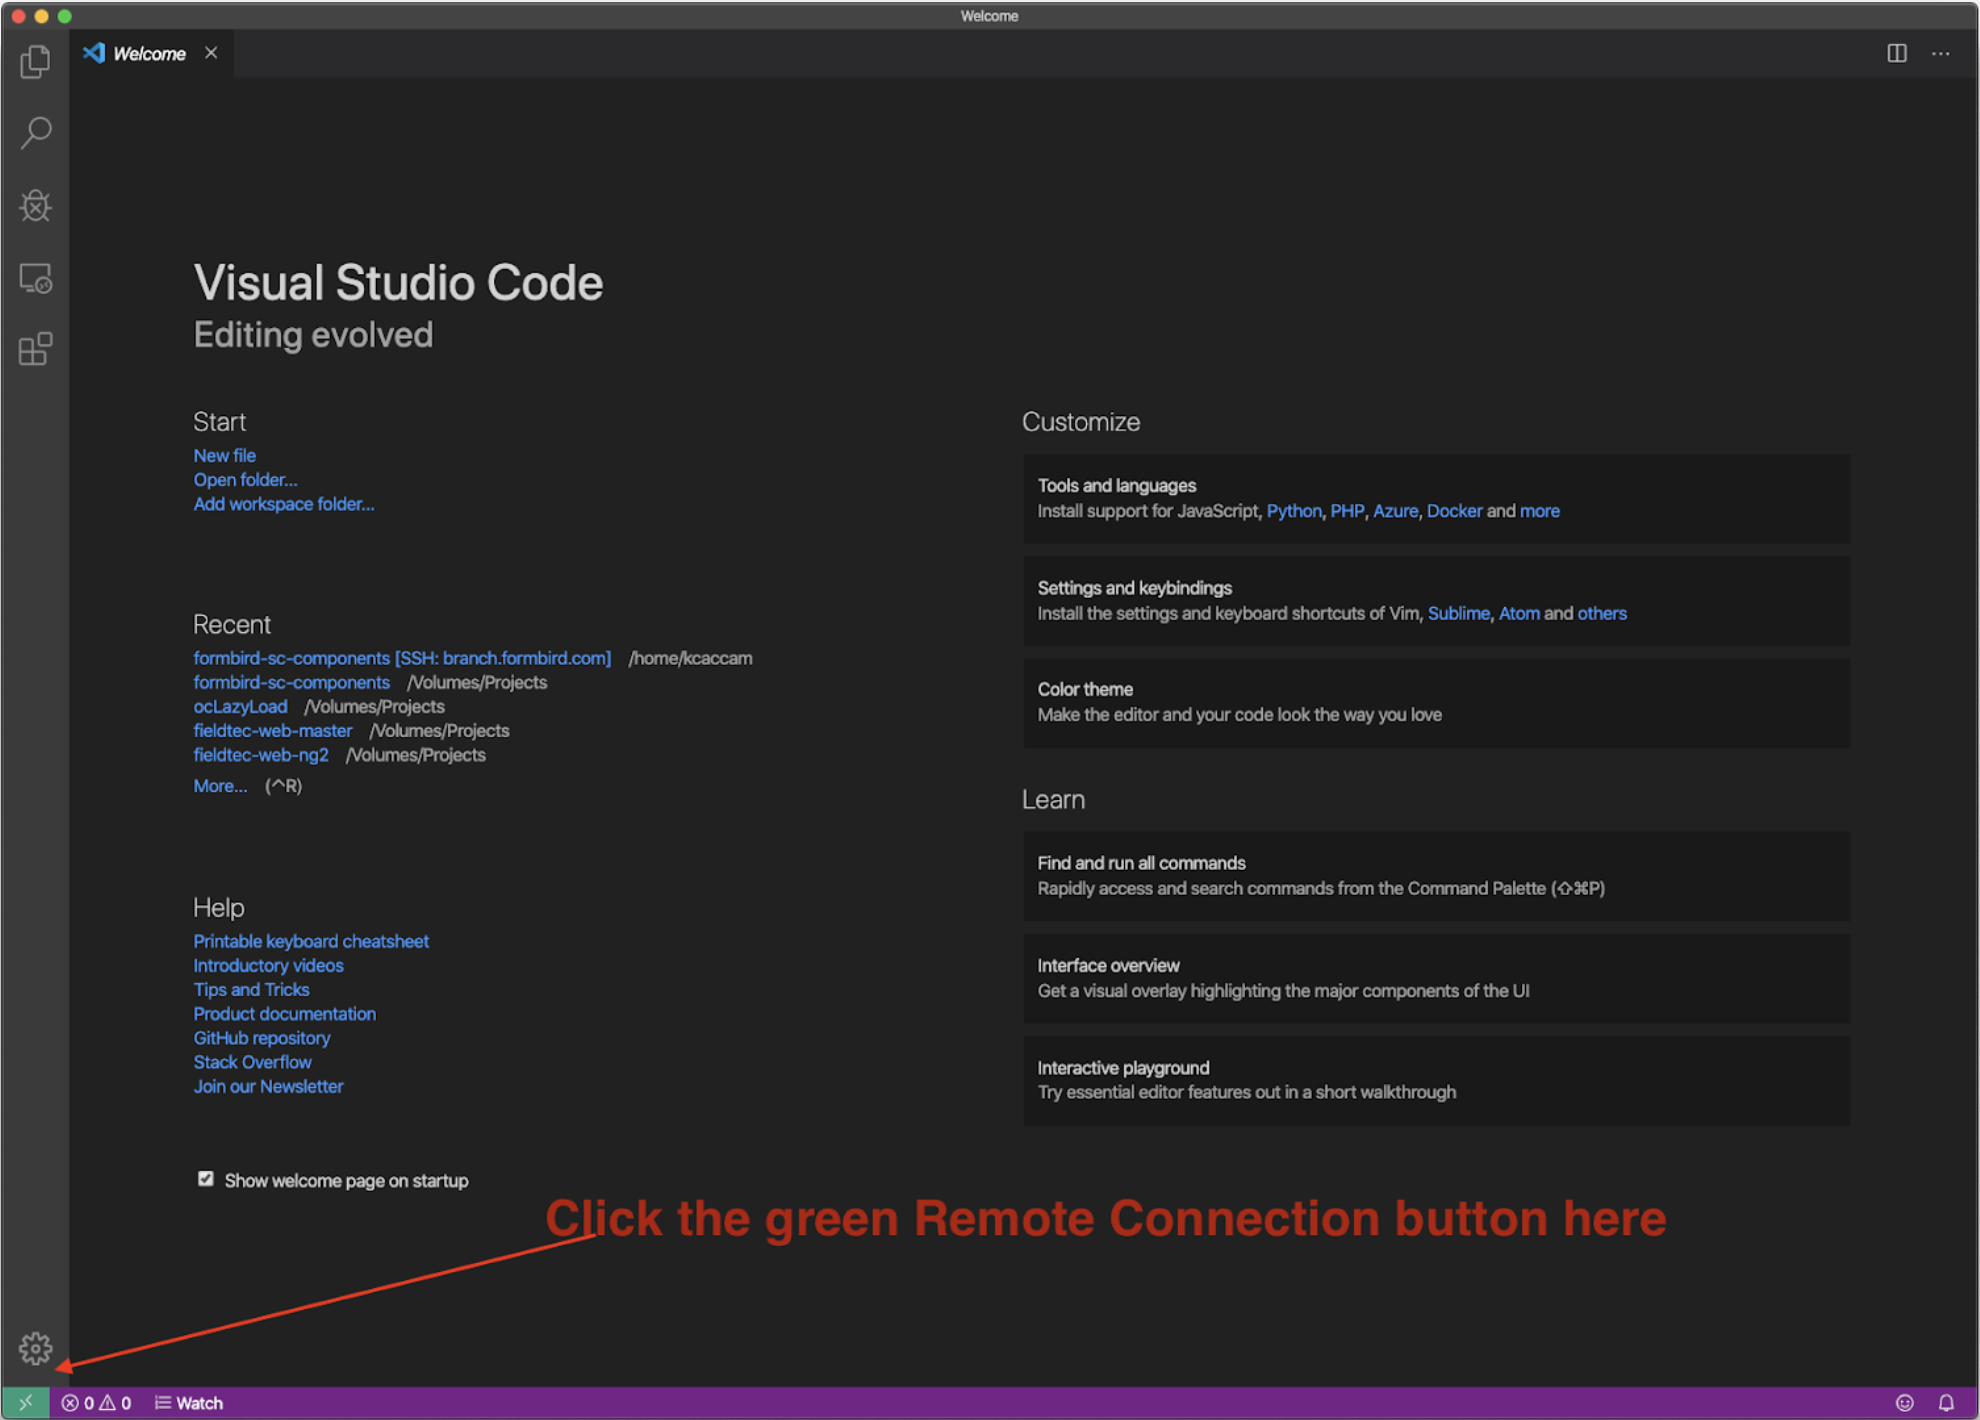
A Green Remote connection button is added by the Remote – SSH extension in the bottom left corner, as shown in the screenshot below. Click it to create the SSH connection:
This brings up a search box with a number of SSH options. Select the option labeled “Remote SSH: Connect to Host” and then select the “+ Add New Host” option, as shown in the video at https://mantis.formbird.com/file_download.php?file_id=9584&type=bug. This brings up a text box labeled “Enter SSH Connection Command. In this text box, enter an ssh command similar to
ssh <username>@fileshare.formbird.comeg.
kcaccam@fileshare.formbird.comMark Hosking needs to set up an ssh user on the server for this to work.
-
Configure git with your username and email in the terminal in VSCode:
git config --global user.name "Kevin Caccam"
git config --global user.email kevin.caccam@formbird.com
The connection process is shown in the video at MakingTheRemoteConnection.mp4