Basic Component Development
Created by jGalland 10/04/24
Using our git repository, the github codespace functionality allows for the most basic setup. We can now create and edit components through Github and Visual Studio Code Online. This can also just as easily be done on your local computer and we will go through both processes.
Component development can now be performed from within the browser with component updates only a refresh away. Makes it much easier for setup of accounts, key and environment management for new users.
Feel free to move through this example I did with Pete. Basic component development Angular Recording
Setup environment
Open Formbird components starter repository github here:
Navigate to the desired branches: either angular-starter or react-starter. Note: you will need to be signed in on github with your formbird account to be able to view these paths.
Option 1: Create Codespace
From the browser, using one of the branches above on github, create the codespace environment...
Click the green Code
Select the codespaces tab
Click the dropdown on right of Create codespace on angular
Select Configure and create codespace
Change machine type from 2-core to 4-core
Click Create codespace
Allow codespace to open. Once the page is loaded
Once the page is loaded open terminal by...
Ctrl `
Set up Environments
Now we want to set up the enironment as you would a local one.
To set up the dependencies.
yarnIf you have any issues try
yarn cache clean
Next time you want to use the environment you can simply navigate to the codespaces dropdown in formbird-sc-components and select from your codespaces
Build your first component - angular
To build the angular-starter component simply run the following command
yarn build
This will create a build for the component in .dist. eg...
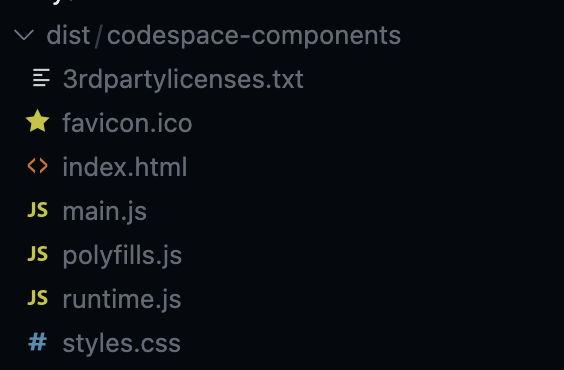
The actual files for the component can be found in src/components/angular-starter

Using the cdn-deployer tool
In order to have your component hosted 24/7 and so others can see/use it we can use the formbird cdn server.
We want to copy the directory
/workspaces/codespace-components/dist/... onto the content delivery network (CDN). We do this by using the cdn-depolyer tool. Simply run...
yarn deploy
This command will build and deploy the component to the cdn. Note the second last log contains the cdn_url that the component has been deployed to. We will use this in the vendorLibrariesRel on the component. eg. https://cdn.formbird.com/components/angular-starter-component/v1
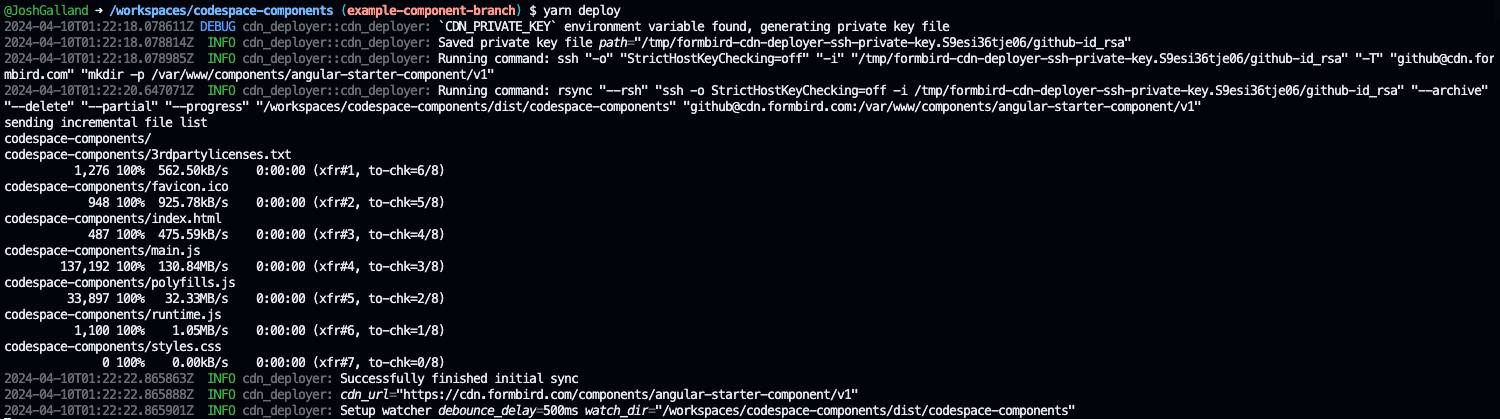
Also the cdn-deployer tool will continue to watch the dist file. This allows you to keep posting changes to .dist if you build from another terminal. For now, exit using keys ctrl-c.
Behind the scenes the following command is run: ( can be found in angular.json > scripts )
cdn-deployer -p angular-starter-component -s v1 dist/codespace-components/*
The cdn deployer tool works as follows....
cdn-deployer -p projectName -s 'suffix' /path-to-dist/
eg. cdn-deployer -p angular-starter-component -s v1 dist/codespace-components/
As mentioned before we can post to the cdn we must build...
To save new changes to the CDN we need to compile the distribution using
yarn build
To verify your changes visit https://cdn.formbird.com/components/. The files may not necessarily be visible in the browser.
Creating your own git development branch
In the terminal we want to create and switch to a new branch. This will mean that you can push changes for other people to view your code under the codespace-components git repository.
To do so run the following command in the terminal. Replace yourName with your name or example name as required.
git checkout -b 'yourName-starter'
This will create and switch to a new local git branch. To check your current branch use...
git branch
For further info on git commands and repositories see Getting started with git: create a commit.
Formbird component document creation
Note: please check whether angular-starter-component has been created. See angular-component-starter and react-starter-component in comp-dev-ng.
In this section we will be creating a formbird component document with the required information. This section builds on the previous angular component section.
Navigate to the component editor in comp-dev-ng or your chosen environment.
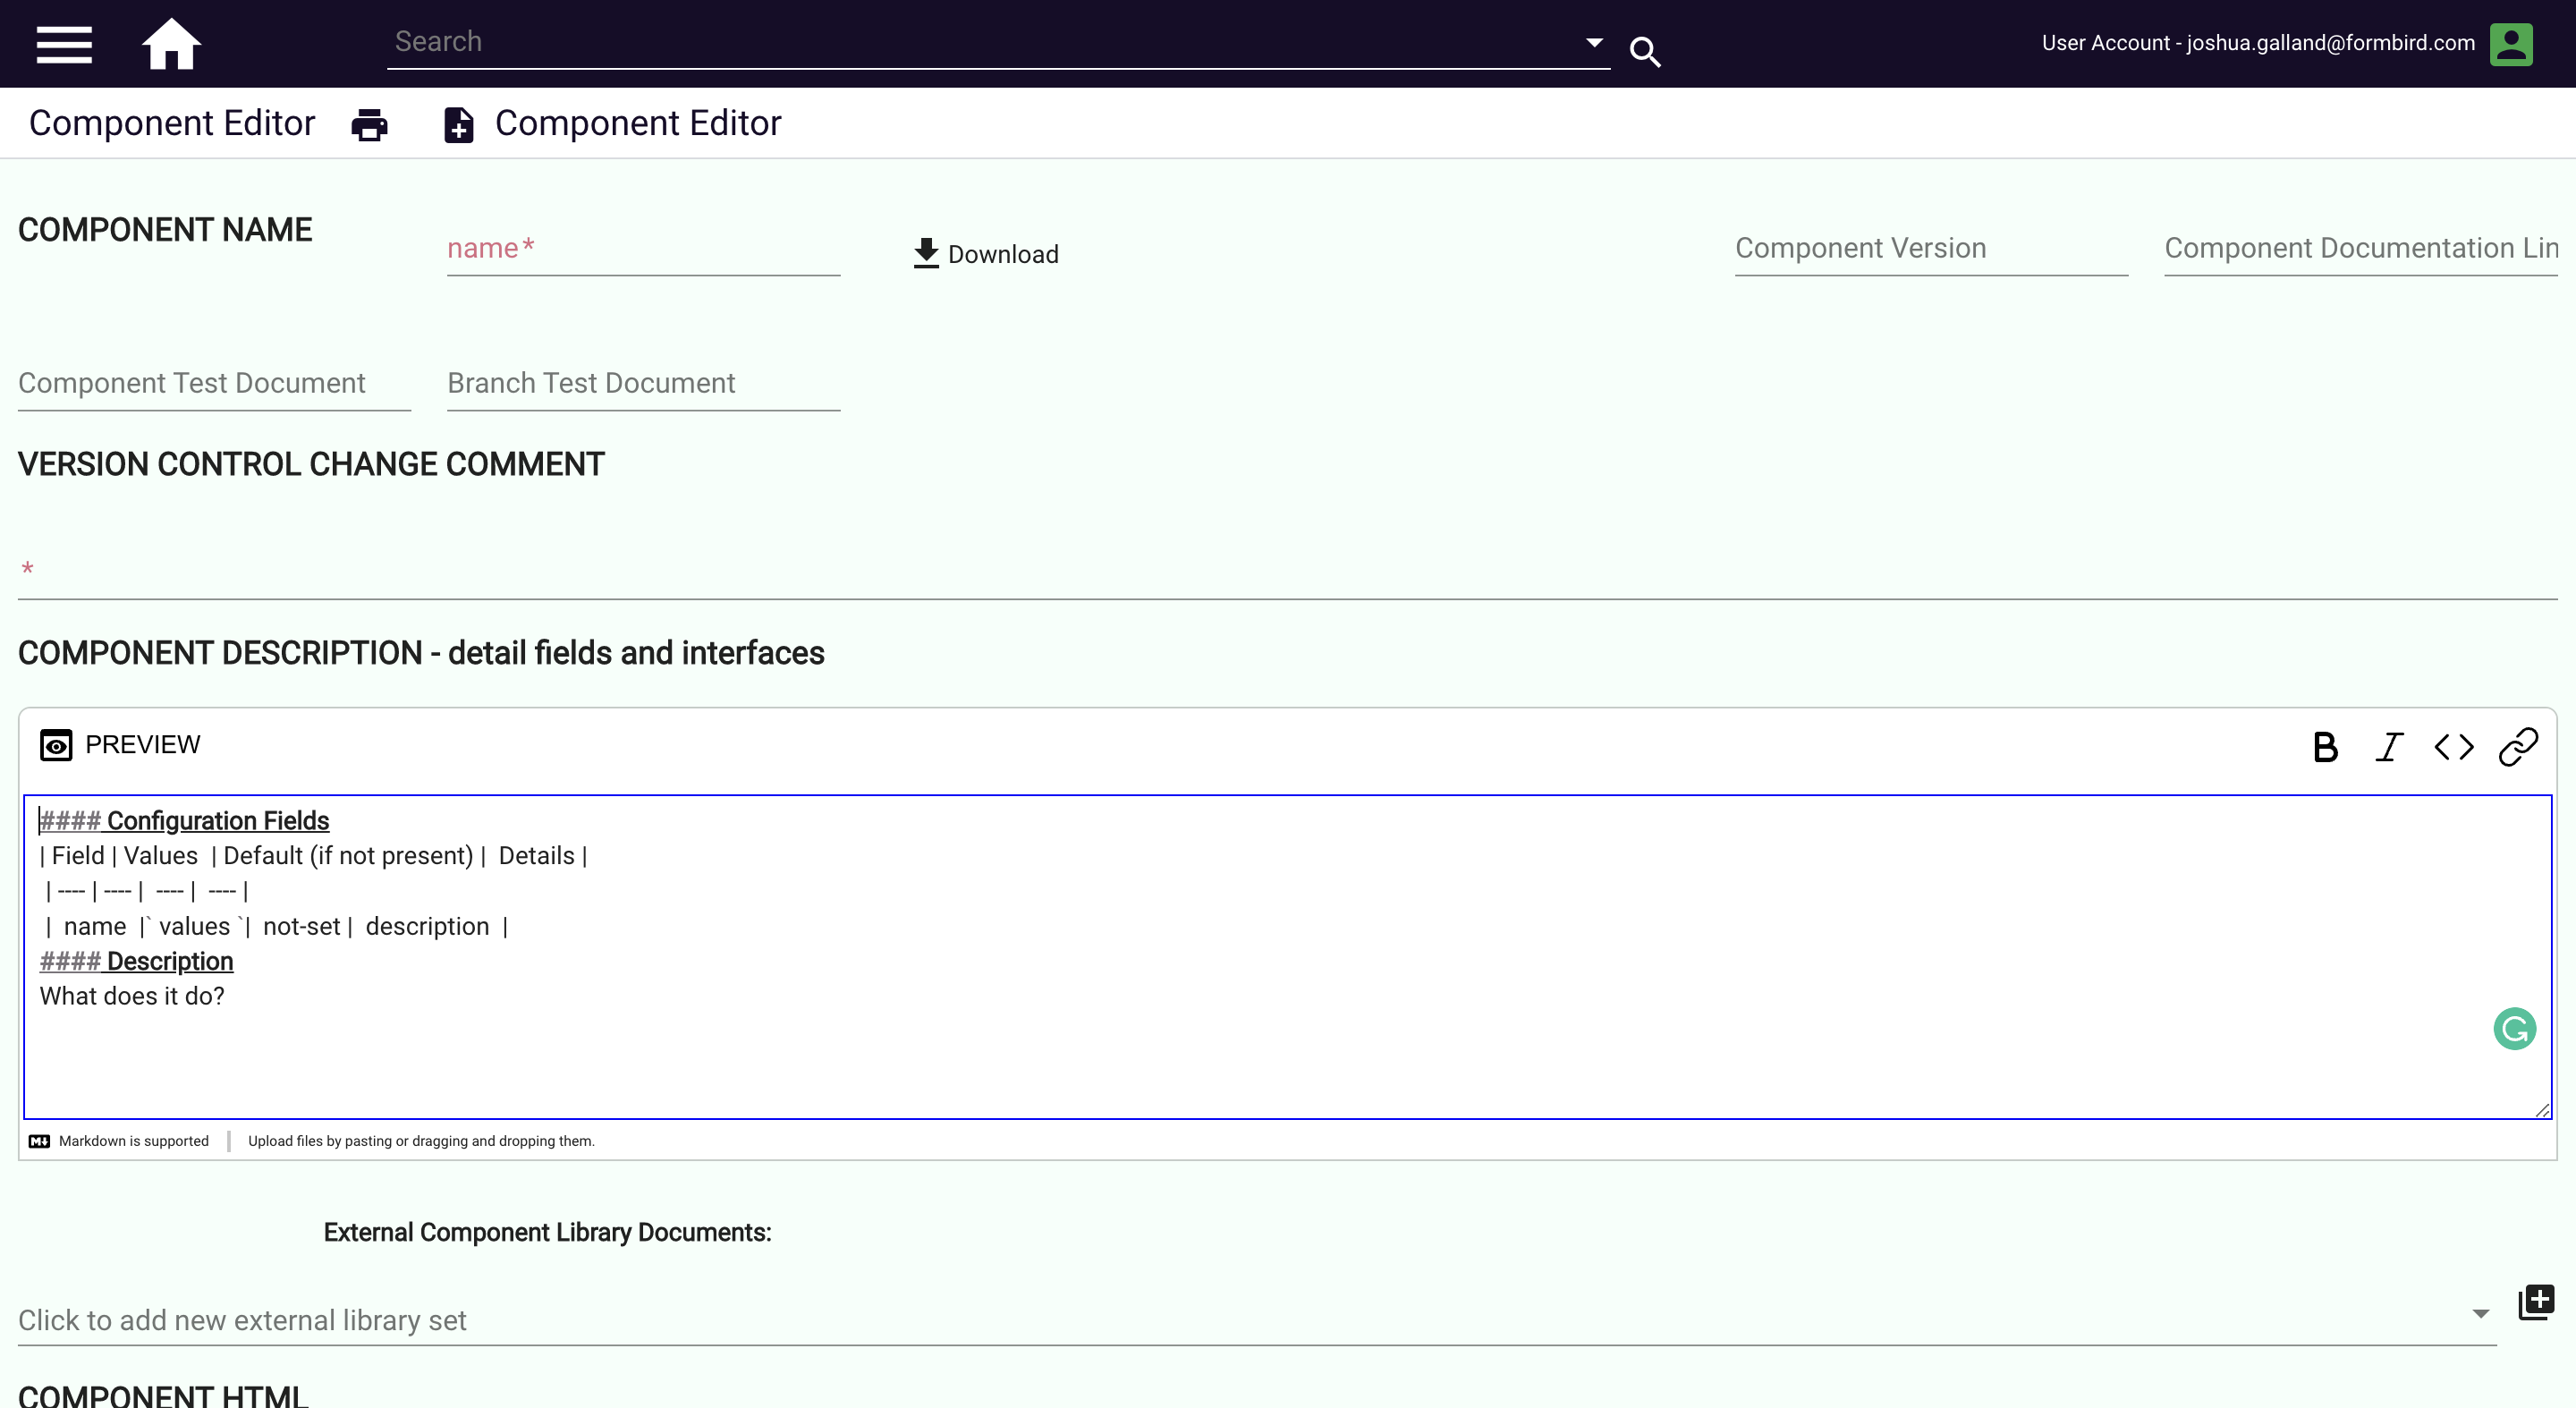
Add in component name. For this example we will be creating angular-starter. Add in a version control comment (I use the mantis ID that I'm working off). Now save the component.
Open the component using the template editor and add the following vendorLibrariesRel field to it.
"vendorLibrariesRel": [
                {
            "name": "jquery",
            "fileName": "https://code.jquery.com/jquery-3.5.1.js"
        },
        {
            "name": "CdnFormbirdRunTime",
            "fileName": "https://cdn.formbird.com/components/angular-starter-component/v1/codespace-components/runtime.js"
        },
        {
            "name": "CdnFormbirdPolyfills",
            "fileName": "https://cdn.formbird.com/components/angular-starter-component/v1/codespace-components/polyfills.js"
        },
        {
            "name": "CdnFormbirdStyles",
            "fileName": "https://cdn.formbird.com/components/angular-starter-component/v1/codespace-components/styles.css"
        },
        {
            "name": "CdnFormbirdMain",
            "fileName": "https://cdn.formbird.com/components/angular-starter-component/v1/codespace-components/main.js"
        }
    ]
If you have any issues you may need to add jQuery to the page load
Next create a new template with the component you want to make. This will be our component testing document going forward so give it a summary name like angular-starter-component testing document. Save and then add in the component like so...
"components": [
    {
                "componentName": "angular-starter-component",
                "name": "exampleComponent"
    }
]
Add the document URL into the Component Test Document url section so we can easily access it later.
If you havent created the angular component and done everything correctly with a bit of luck we should see the default HTML for the component which is...
<p>angular-starter works!</p>
You have now successfully created your own formbird angular component.
Suggested next steps
If you've made it this far, you should have your own git branch under codespace-components and have all the required component fields setup.
From here I suggest you change the -s key in the package.json -> scripts -> deploy command to be unique to you. Eg. yourNameV1.
Then go and change the component package vendorLibraries component fileName to be unique to your new CDN path. Make sure to keep the old one so you can change it back. I comment out the old one just with an X on the end so it doesn't get used.
"vendorLibrariesRel": [
        {
            "name": "jquery",
            "fileName": "https://code.jquery.com/jquery-3.5.1.js"
        },
        {
            "name": "CdnFormbirdRunTime",
            "fileNameX": "https://cdn.formbird.com/components/angular-starter-component/v1/codespace-components/runtime.js",
            "fileName": "https://cdn.formbird.com/components/angular-starter-component/yourNameV1/codespace-components/runtime.js"
        },
        ...
Go forth and learn angular!
Build your first component - react
Having created the codespace on the react-starter branch, build the environment using
yarn
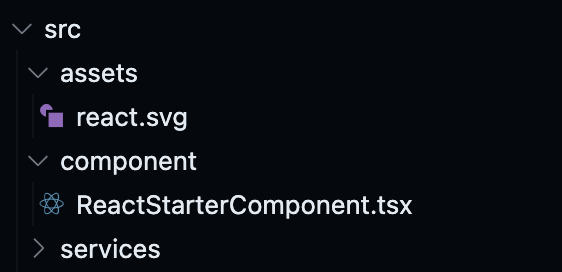
This time we find the react component in src/assets/component.
To build the react starter component simply run the following command...
yarn build
This will create a build for the component in .dist. eg...
Finally to post the component to the CDN we use the same command
yarn deploy Alternatively we can use cdn-deployer -p dev/react-starter -s 0.0 /workspaces/codespace-components/dist/assets/index.js
The above will post the component to the cdn at location. Again the deploy command is defined in package.json.
https://cdn.formbird.com/components/dev/react-starter/0.0/...
the corresponding vendor libraries definition would be...
"vendorLibrariesRel": [
                {
            "fileName": "https://cdn.formbird.com/components/dev/react-starter/0.0/index.js",
            "name": "CdnFormbirdReactStarterRunTime"
        }
    ]
Now go learn react!